MortarNet™ with Insect Barrier™ | The Original Mortar Dropping Collection Device
Installation Instructions
- Fast and easy to use – no fasteners or adhesives, no special skills or tools. After the first one to two courses of bricks are laid, place a continuous row of MortarNet™ with Insect Barrier™ in cavity or collar joint on flashing (trapezoidal side up) against inside of outer wythe at base of wall with Insect Barrier fabric on 0.4” and 1”, or beige hi-loft fabric on 1.5” and 2” facing exterior of building (see diagram).
- Install MortarNet™ with Insect Barrier™ directly on flashing at base of wall, over all wall openings, shelf angles, sills or lentils.
- Install MortarNet™ with Insect Barrier™ at every floor level. For wall-cavities that exceed 11’ in height, place an additional continuous trapezoidal strip on wall reinforcing anchors/ties at every 9’ to 11’ of wall height.
- Flashing should extend from bottom to 6” above the top of MortarNet™ with Insect Barrier™, as should any other materials used to fill space between MortarNet™ with Insect Barrier™ and inside cavity surface.
- If 1”, 1.5” or 2”-thick MortarNet™ with Insect Barrier™ is used, no more than 1/4” should be left between MortarNet™ with Insect Barrier™ and cavity’s inside surface (flashing or filler). 0.4”-thick MortarNet™ with Insect Barrier™ should touch both cavity surfaces, or can be used as additional filler with other widths of MortarNet™ with Insect Barrier™ – trapezoidal side up and aligned with each other. MortarNet™ with Insect Barrier™ is compressible to allow for variations in wall cavity widths.

MortarNet with Insect Barrier available in 0.4", 1", 1-1/2", & 2"
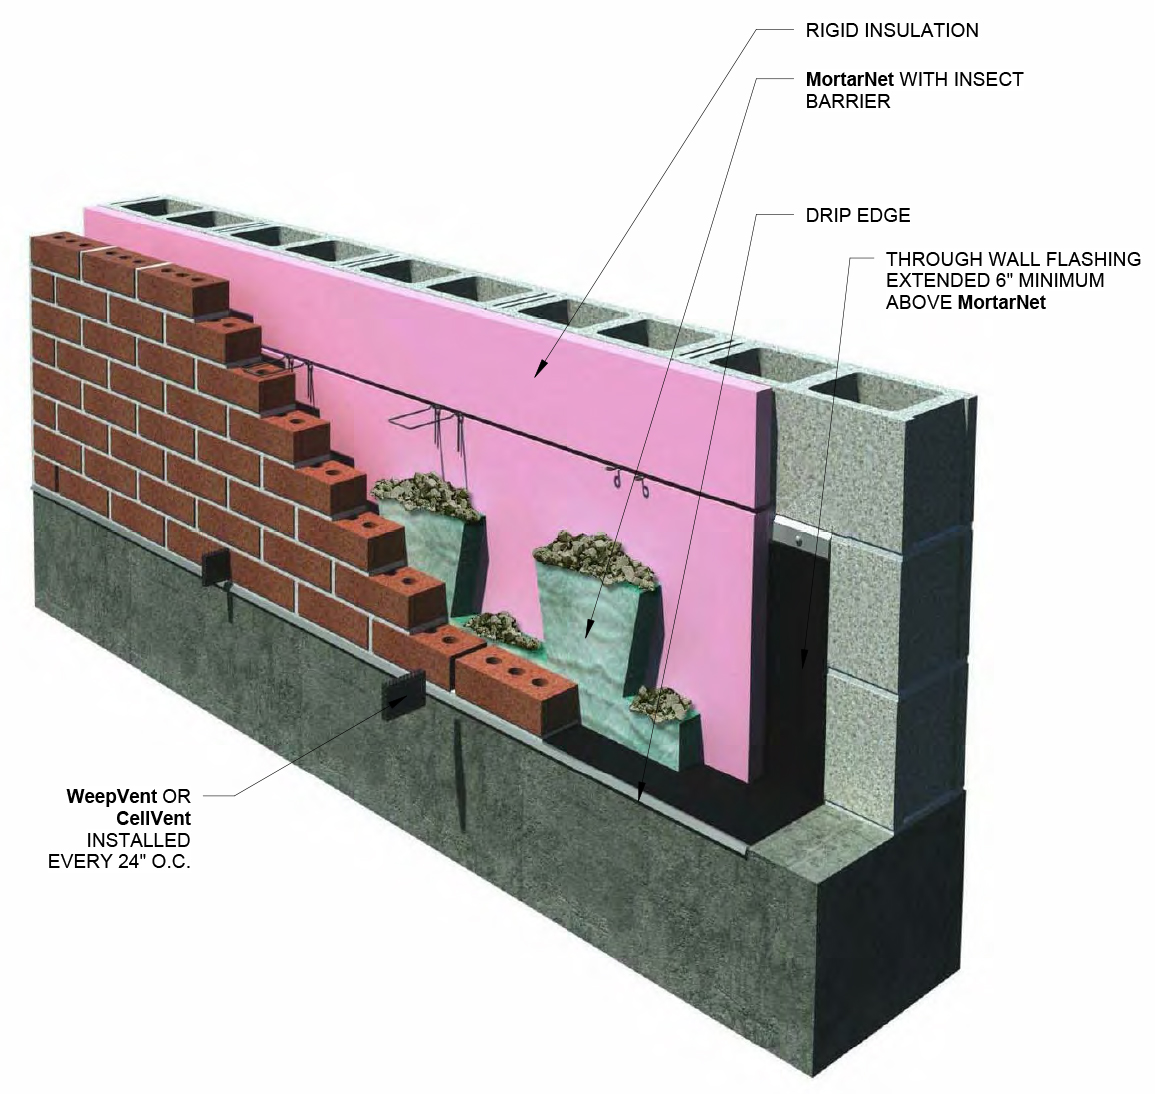
Wall Base Detail

Window Head Detail